Monitoring Program and Process With Supervisor
Supervisor is a client/server system that allows its users to monitor and control a number of processes on UNIX-like operating systems. It provides you with one place to start, stop, and monitor your processes. Processes can be controlled individually or in groups.
Supervisor starts its subprocesses via fork/exec and subprocesses don’t daemonize. The operating system signals Supervisor immediately when a process terminates, unlike some solutions that rely on troublesome PID files and periodic polling to restart failed processes.
Supervisor Components
Supervisord: The server piece of supervisor is named supervisord. It is responsible for starting child programs at its own invocation, responding to commands from clients, restarting crashed or exited subprocesseses, logging its subprocess stdout and stderr output, and generating and handling “events” corresponding to points in subprocess lifetimes.
Supervisorctl: The command-line client piece of the supervisor is named supervisorctl. It provides a shell-like interface to the features provided by supervisord.
Web Server: A (sparse) web user interface with functionality comparable to supervisorctl may be accessed via a browser if you start supervisord against an internet socket. Visit the server URL (e.g. http://localhost:9001/) to view and control process status through the web interface after activating the configuration file’s [inet_http_server] section.
XML-RPC Interface: The same HTTP server which serves the web UI serves up an XML-RPC interface that can be used to interrogate and control supervisor and the programs it runs.
Installation
Installing With pip
pip install supervisorDepending on the permissions of your system’s Python, you might need to be the root user to install Supervisor successfully using pip.
Manual installation
Downloaded the current release from https://pypi.org/pypi/supervisor/. After unpacking the software archive, run
python setup.py installIt will download and install all distributions depended upon by Supervisor and finally install Supervisor itself.
Basic Configuration
Once the installation is complete, we have to generate our configuration file. Create a folder named supervisor inside /etc.
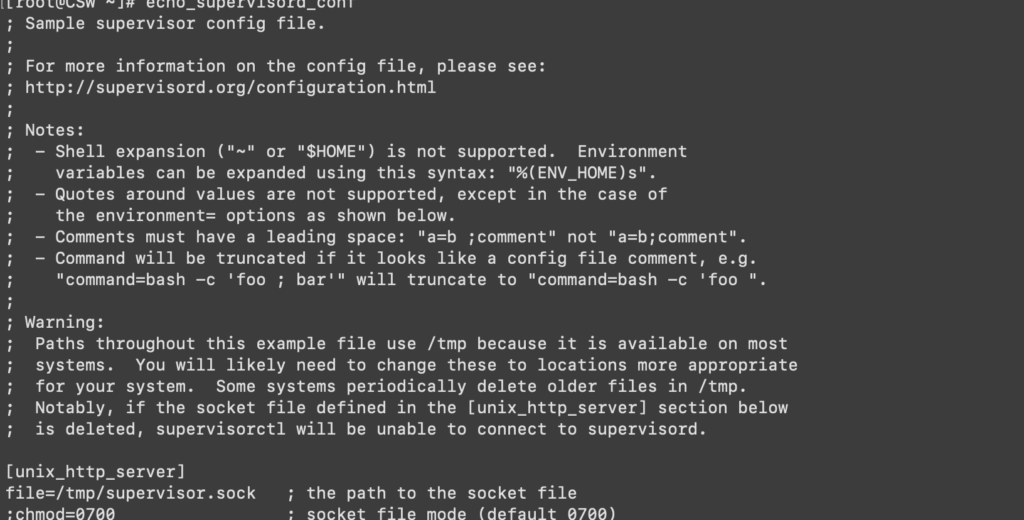
sudo mkdir /etc/supervisorTo see the sample configuration, run the command echo_supervisord_conf to print a “sample” Supervisor configuration file to your terminal stdout.
echo_supervisord_conf
Next, type the command below as root:
echo_supervisord_conf > /etc/supervisor/supervisord.confTo add programs to be managed by supervisor we just need to create the appropriate [program] sections in /etc/supervisor/supervisord.conf file. We will be using the [include] section in order to avoid tampering with system settings. Locate the section below, uncomment it and then edit it to look like the following.
;[include]
;files = relative/directory/*.ini
[include]
files=conf.d/*.conf
For each program we would like to add to supervisor, we will be creating a .ini file inside the /etc/supervisor/conf.d/ directory. Create the folder with the command below:
sudo mkdir /etc/supervisor/conf.d
Start supervisord
To start supervisord, we will run supervisord command. For the first time, You can use the -n option to launch it in the foreground which is useful to debug startup problems and the -c flag to indicate the full path of the configuration file. The resulting process will daemonize itself and detach from the terminal. It keeps operations log at /tmp/supervisord.log by default. If you don’t use the -c, supervisord will first search the configuration in the current folder
supervisord -c /etc/supervisor/supervisord.conf
Adding Programs
Note: All programs run under Supervisor must be run in a non-daemonising mode (sometimes also called ‘foreground mode’). If, by default, the program forks and returns on startup, then you may need to consult the program’s manual to find the option to enable this mode, otherwise Supervisor will not be able to properly determine the status of the program.
For this guide, we are going to create a shell script that we want to keep running that we have saved at
# supervisor_hello.sh.
# sudo touch supervisor_hello.sh
# sudo nano supervisor_hello.sh
#!/bin/bash
while true
do
echo "This is Metzakaria"
# Echo current timestamp to stdout
echo Hello Supervisor: `date`
# Echo 'error!' to stderr
echo An error occurred at `date`! >&2
sleep 1
DoneMake the script executable with the command below:
sudo chmod +x supervisor_hello.shNext, we need to create the corresponding configuration file by running the following:
sudo touch /etc/supervisor/conf.d/supervisor_hello.confAdd the following with nano
[program:supervisor_hello]
command=/home/metzakari/supervisor_hello.sh
autostart=true
autorestart=true
stderr_logfile=/var/log/hello.err.log
stdout_logfile=/var/log/hello.out.log
After successfully adding a new program, we should run the following two commands, to inform the server to reread the configuration files and to apply any changes.
sudo supervisorctl rereadsudo supervisorctl update
Managing Programs
Once our programs are running, there will undoubtedly be a time when we want to stop, restart, or see their status. The supervisorctl program, which we first used above, also has an interactive mode through which we can issue commands to control our programs.
To enter the interactive mode, start supervisorctl with no arguments:
sudo supervisorctl
When started, supervisorctl will initially print the status and uptime of all programs, followed by showing a command prompt. Entering help will reveal all of the available commands that we can use:
supervisor> help
To start in a simple manner, we can start, stop and restart a program with the associated commands followed by the program name:
# supervisor> stop supervisor_hello
supervisor_hello: stopped
# supervisor> start supervisor_hello
supervisor_hello: started# supervisor> restart supervisor_hello
supervisor_hello: stopped
supervisor_hello: startedUsing the tail command, we can view the most recent entries in the stdout and stderr logs for our program:
# supervisor> tail supervisor_helloFinally, once we are finished, we can exit supervisorctl with Ctrl-C or by entering quit into the prompt:
# supervisor> quit
The Web Server Client
The Web Server Client To allow access to the supervisord web server, open the supervisord configuration file and locate the [inet_http_server] section.
sudo nano /etc/supervisor/supervisord.confEdit it with the with the following configuration:
[inet_http_server]
port=*:9001
username=user
password=123
You can replace the username: user and password:123 with your desired credentials, save the file and the restart supervisord service.
Note that you have to allow TCP access to the port 9001 on your firewall before you can access http://{server-ip}:9001 from your browser.
At this stage, we have successfully installed and configured the latest version of supervisord.
